The NetSuite Integration for WooCommerce plugin syncs your orders, product inventory/prices, and customers. Its features offer deep enhancement capabilities when you use it with advanced mappings like currencies, subsidiaries, shipping methods, custom forms, sales reps, and classes or any other NetSuite field with conditional mapping features. We also provide an additional feature to sync item inventory/prices manually.
To establish the connection between NetSuite and WooCommerce “General Settings” are the most important.
General Settings
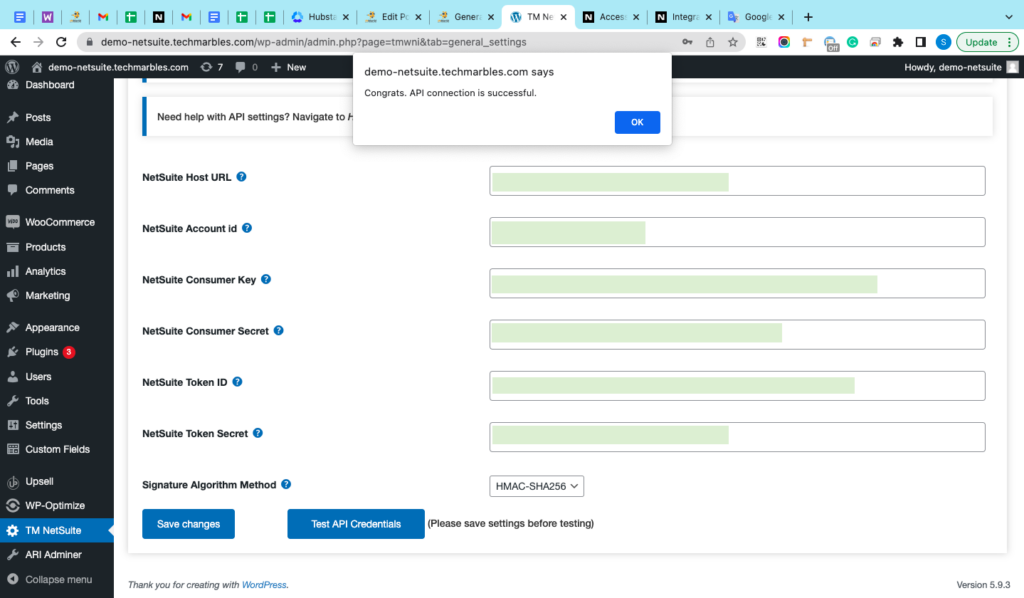
To make a connection between NetSuite and WooCommerce we need the values of the below fields:
- NetSuite Host URL
- NetSuite Account ID
- NetSuite Consumer Key
- NetSuite Consumer Secret
- NetSuite Token ID
- NetSuite token Secret
To get the values for these fields, follow the below mention steps:
- The first step is to get the NetSuite Host URL and NetSuite Account ID
- Login to your NetSuite account
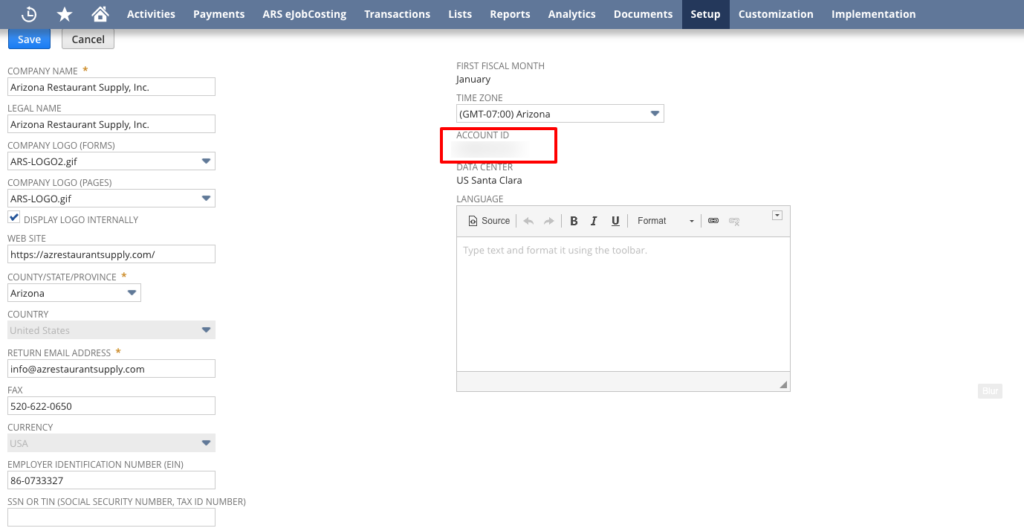
- Go to Setup >> Company >> Company Information
- Here you will get the Account ID. Copy the account id and paste it into WooCommerce
- To get the Host URL, scroll down
- Go to Company URLs
- Copy the URL under SUITETALK (SOAP AND REST WEB SERVICES), and paste it into WooCommerce

2. To get the NetSuite Consumer Key and NetSuite Consumer Secret
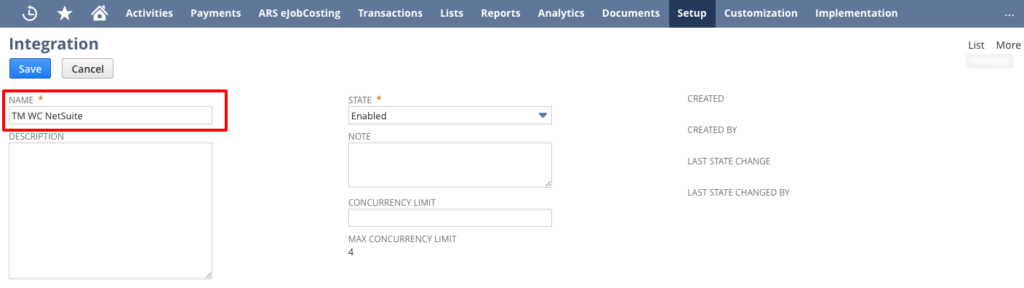
- Go to the Setup >> Integration >> Manage Integrations >> New
- Enter the name of the application (name could be of your choice for example, “TM WC NetSuite”)
- Uncheck the following two checkboxes:
- TBA: AUTHORIZATION FLOW
- AUTHORIZATION CODE GRANT
- Make sure the following two checkboxes are checked:
- TOKEN-BASED AUTHENTICATION
- USER CREDENTIALS
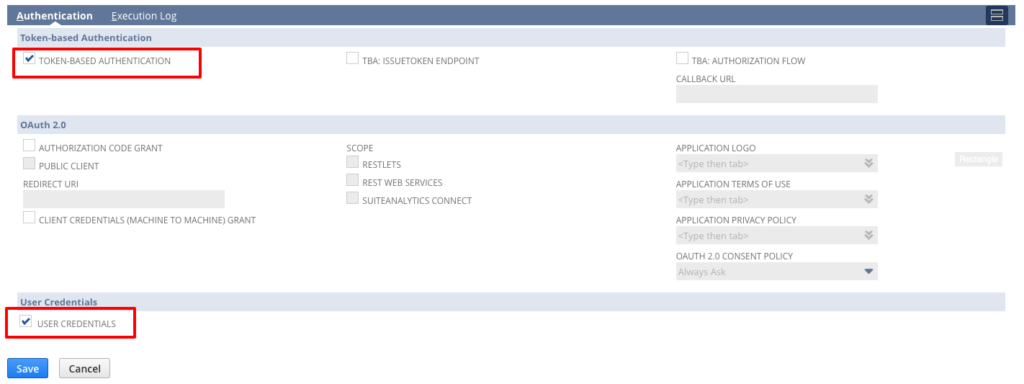
- Click the Save button
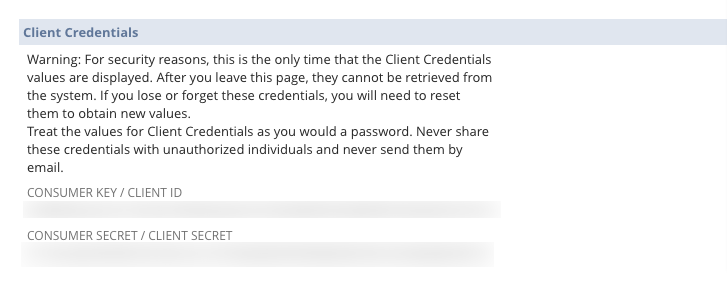
- After saving the Integration form You will get the CONSUMER KEY / CLIENT ID and CONSUMER SECRET / CLIENT SECRET
- Copy the Consumer Key and Consumer Secret and paste it into WooCommerce
3. To get the NetSuite Token ID and NetSuite Token Secret
NOTE* make sure your current user role has the required permissions to
- Go to the Home icon >> Dashboard
- Click on Manage Access Tokens
- Click on the New My Access Token button
- Select the Application name that you have created in New Integration form
- Click the Save button, and you will get the Token ID and Token Secret
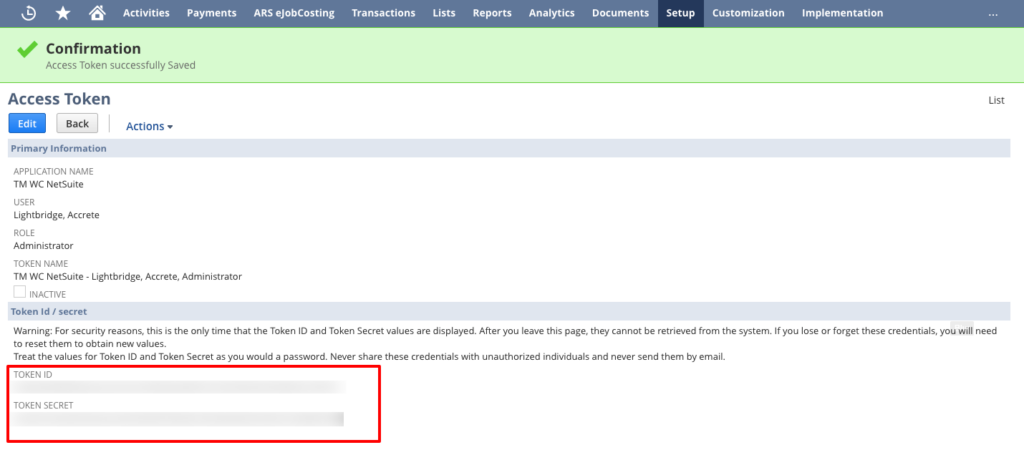
- Copy the Token ID and Token Secret and paste them into WooCommerce
4. Signature Algorithm Method
- Select the” HMAC-SHA256 ” method
- Click Save changes button
After saving the settings, we need to check if the connection is established successfully or not. To check that “Test API Credentials”. If the connection is successfully established then a pop up will show with the success message “Congrats. API connection is successful.”.
Required User Role Permissions:
- Go to Setup > User Roles > Manage Roles
- Select your user role and check the permissions if they are as mentioned below. If not, click “Edit” and change the permission levels, as explained in the following steps.
- Under TRANSACTION Tab, set following mentioned permission levels, to the below fields:
- Sales Order – Full
- Item Fulfillment – Full
- Fulfil Sales Order – Full
- Under LIST Tab, set following mentioned permission levels, to the below fields:
- Items – View
- Location – View
- Currency – View
- Promotions – Full
- Shipping items – View
- Under SETUP Tab, set following mentioned permission levels, to the below fieldsCompany information:
- User Access Tokens – Full
- Integration Application – Full
- SOAP Web Services – Full
- Accounting Lists – Full
- Click Save
Creating roles on NetSuite:
- To create a new Role, navigate through the following steps in Netsuite.
- Setup > User Roles > Manage Roles > New.
- Enter the name of the Role.
- In the CENTRE TYPE field select ACCOUNTING CENTRE in General settings.
- Check option DO NOT RESTRICT EMPLOYEE FIELDS in General settings.
- In SUBSIDIARY RESTRICTIONS check the option SELECTED.
- In AUTHENTICATION enable option WEB SERVICES ONLY ROLE.
- Assign the above mention permissions to the user role
- Click Save